Monday, November 8, 2010

Caramel Oat Slice


The other day I bought a cookbook called 'It's Easier Than You Think' by Jo Seager. It has pretty basic recipes in it but one of my favourite recipes to make called Emily's Lemon Shortcake is from her previous cookbook, and given how much I love that recipe (it's here on my blog), I thought I would get this one too. I know it seems mad to buy a cookbook based largely on a recipe you love from a previous cookbook, but I knew that at least the baking recipes in her new book would be good therefore justifying the purchase. This recipe is from her new cookbook and it does not disappoint. 


Caramel slice is one of my all time favourite things to eat. I am constantly on the search for  an all-time, go-to recipe so of course I this was always going to be one of the first recipes I was going to make from this book. I'm not so keen on having chocolate on my caramel slice preferring instead to enjoy a thick layer of caramel and making that the star. I find that chocolate can take away from the caramel or else make this already sweet treat too sweet. With this recipe you can drizzle over chocolate if you like but I left this off....partly because of the above reasons, but also because I was making it in the middle of nights and completely forgot to do that step. This recipe is lovely with a thick layer of caramel, (I know the photos look like I have been dunking my finger in but really I didn't...well not then anyway...), and a soft base. I probably prefer my base to be a little firmer but I also enjoy the almost cake-like texture mixed with the caramel. I only made half the recipe and it made plenty so the full recipe would feed a small army. Here it is if you want to try it:


Caramel Oat Slice


2 c flour
1 c self raising flour
1 c desiccated coconut
2 c brown sugar
3 c rolled oats (I used the small ones)
2 eggs
300 gm butter, melted


Filling


200 gm butter
2 cans condensed milk
4 Tbsp golden syrup
1 tsp vanilla


Melted chocolate to decorate.


Oven to 180 C. Line a large tin 25 x 35 cm with baking paper and grease. 


Combine the dry ingredients in a bowl then add eggs and the melted butter. Mix well and press 2/3 of the mixture into the tine.


Make the filling by melting the butter, golden syrup and condensed milk in a pot until well blended then add the vanilla. Pour over the base and sprinkle the remaining crumble mixture over the top.


Bake for 30 mins. Cool in the tin and refrigerate before cutting.


Decorate if you want with melted chocolate.

Sunday, November 7, 2010

Baking for Nightshift- Peanuttiest Blondies


Tonight is my last night of three looong nightshifts and as I haven't baked for this set of nights yet, I thought I would make something to take to work tonight. As well as that someone is leaving so everyone (or most people) will be bringing something to have at work. I keep my eye on a baking blogging group called Tuesdays with Dorie. Unfortunately for me I was too late to the blogging world to join in and now the group is closed. However I still keep an eye on what's being made and read up about it to see if it's worth having a go. The book they cook from is called 'Baking: From my Home to Yours' by Dorie Greenspan and is an absolutely fantastic book- well worth the purchase as I have made many wonderful recipes from this and they all seem to work and taste great. From what I read this recipe was really good although some people suggested leaving out the cinnamon and making them in a bigger tin. Although they are meant to be cake-like, they felt that they would have been better to have been thinner. 


I like to think that I do what I'm told....well er on occasion I do (sort of)... but these bakers know what they are talking about so this time I really did do as I was told. This is a very easy recipe to make and barely took anytime at all to whip up. I used crunchy peanut butter, salted roasted nuts and some milk chocolate buttons in mine. I left out the cinnamon and baked it in a bigger tin so they were more flat. I think this was a good move. I certainly don't miss the cinnamon and baking them in a bigger tin seems to have made them more chewy and tasty. I love the salty, sweet flavour and I think they will go down a treat. I also baked a caramel square to take but will post about that tomorrow. If you want the recipe go here to find it as the person who chooses the recipe gets to post it on their blog. 

Guy Fawkes with the Boys

This year we did Guy Fawkes the day before as I was about to start three nightshifts and the boys were going to be at their dads house. Reuben, being that much older, is really into the bigger fireworks but Harry being that much younger still finds those ones a little scary so prefers the sparklers. The night itself was a bit drizzly but it didn't deter them at all. My camera battery is running quite low so I had to quite selective with my photos....actually I took what I could when I could! Harry had his cousin Beau over for the night but aside from the sparklers he spent the night in the lounge where he could see the fireworks from behind the glass in safety. The photos aren't the best quality but I'll blame it on the camera....


Harry a bit frightened

Reubs with his favourite 'cascade' firework


Beau inside

Reubs looking after Harry


Thursday, November 4, 2010

FFwD- Roast Chicken for Les Paresseux


Les Paresseux translates to lazy people so therefore this weeks FFwD dish is roast chicken for those who are too lazy to faff around too much. She is right...it doesn't get much easier than this. Instead of roasting your chicken in a normal roasting dish you put it, (untrussed), into a dutch oven, (or in my case a Le Creuset casserole dish), with a few bits and bobs, stick it in the oven and leave it to do it's thing. She introduces the 'bread trick' which is to put a slice or 2 of thick country style bread or else a few slices of baguette underneath the chicken to create a 'cook's treat' of crispy, chicken soaked bread. Although the idea appealed I found it to be a little too greasy for my taste...but I could see the how in theory this would be a wonderful idea. I only added carrots and small onions to mine as I roasted some vegetables separately. 

The flavour of this chicken was fantastic. I thought the meat was more juicy and succulent because of the method of cooking it. Surely the high sided dish combined with a bit of wine and oil contributed to this? As well as that the whole head of garlic was amazing. I love how the flavour of garlic mellows so much when you roast it taking it to a whole new level. I will definitely be using this method again to roast my chicken. It was easy, uncomplicated and delicious. See how others found it here.

Cocoa Sables


I made these biscuits for last Sunday when my lovely friend Leon came to visit with his son Billy. They were also in my new book 'Around My French Table' so I wanted to try out this new recipe. I already have Dorie's other baking book called 'Baking: From My Home To Yours' and in that book she also has recipes for sables which I have made before. They are a French style shortbread so are a bit different from the more traditional shortbread in that the texture is more crumbly. I made the mixture on the Friday where they sat already rolled into logs until baking day which was on Sunday. They can also be stored in the freezer so you can use them to whip out and bake up some fresh biscuits when visitors arrive....you would be quite the domestic goddess!!!

They are actually really lovely. I rolled mine in sugar but I think they don't look all that pretty so next time would leave them plain. The texture is crumbly but they still taste buttery and the chopped chocolate (I used 62%), really elevates these to delicious status. The fact that they still taste good today (Thursday), is testament to this recipe.

Tuesday, November 2, 2010

Chocolate Cupcakes and my Fantastic Cake Carrier


Tomorrow is the second time myself and a few others will be running the NZRC (or NZ Resuscitation Council) Day where we teach a group of more senior nurses the new guidelines for newborn resuscitation. The first time we ran it I took in some cupcakes so I thought it is now going to be a thing that I do from here on in.... at least if time permits! This time I made these chocolate cupcakes from a lovely little book called 'Divine Cupcakes' by Tamara Jane. She is a NZ author so it really makes it easy as far as measurements and for sourcing ingredients. I have made this recipe a number of times and it is my second favourite one after the Crabapple Bakery ones. Again the cupcakes are lovely and light with a rich chocolate flavour. My favourite recipe is possibly a bit richer but that has coffee in it which I think adds a different dimension to the flavour of the cupcakes. These ones are well worth trying though and the mixture makes loads of them. I only made 3/4 of the recipe and I got 30 standard sized cupcakes and 12 mini cupcakes. The recipe states that it makes 36 cupcakes from the full mix so maybe their cupcake sizes are bigger than mine.

Another reason for this post is to show you this amazing cake carrier I got from Living and Giving. It is collapsible and can hold up to 24 cupcakes or a tall cake. As I bake so much and am often taking food into work, I find that this stops the cupcakes form falling over and getting crushed, (which seemed to always happen no matter how carefully they were packed).


Isn't it great!!! Quite possibly this is one of the best things I have ever bought. Anyway here is the recipe to which I have slightly adapted the method:

Chocolate Cupcakes

430 gm flour
2 tsp baking soda
1 tsp baking powder
1 tsp salt (I miss this out as I use salted butter)
1 c hot water
100 gm cocoa
1 c cold water
200 gm unsalted butter, softened
560 gm caster sugar
4 eggs
4 tsp vanilla

Oven to 170 C and line cupcake tins.

Sift together flour, soda, baking powder and salt.

Whisk together the cocoa and hot water to a smooth paste then add cold water and mix til smooth.

Cream butter for at least 2 mins until really creamy. Add the caster sugar in 2 lots making sure you cream it really well in between. Add the eggs one at a time and beat for at least a min after each, then add the vanilla.

Add 1/3 of the flour mixture and beat on low speed until it is just combined. Then add 1/2 of the cocoa mix followed by the flour again and so on until it is mixed in. Don't overbeat.

Put into your cupcake tins but don't overfill.

Bake about 20-25 mins until cooked. Take out of the tins and cool on a rack.

I iced mine with a chocolate buttercream which I piped on with the large Wilton star tip.

Monday, November 1, 2010

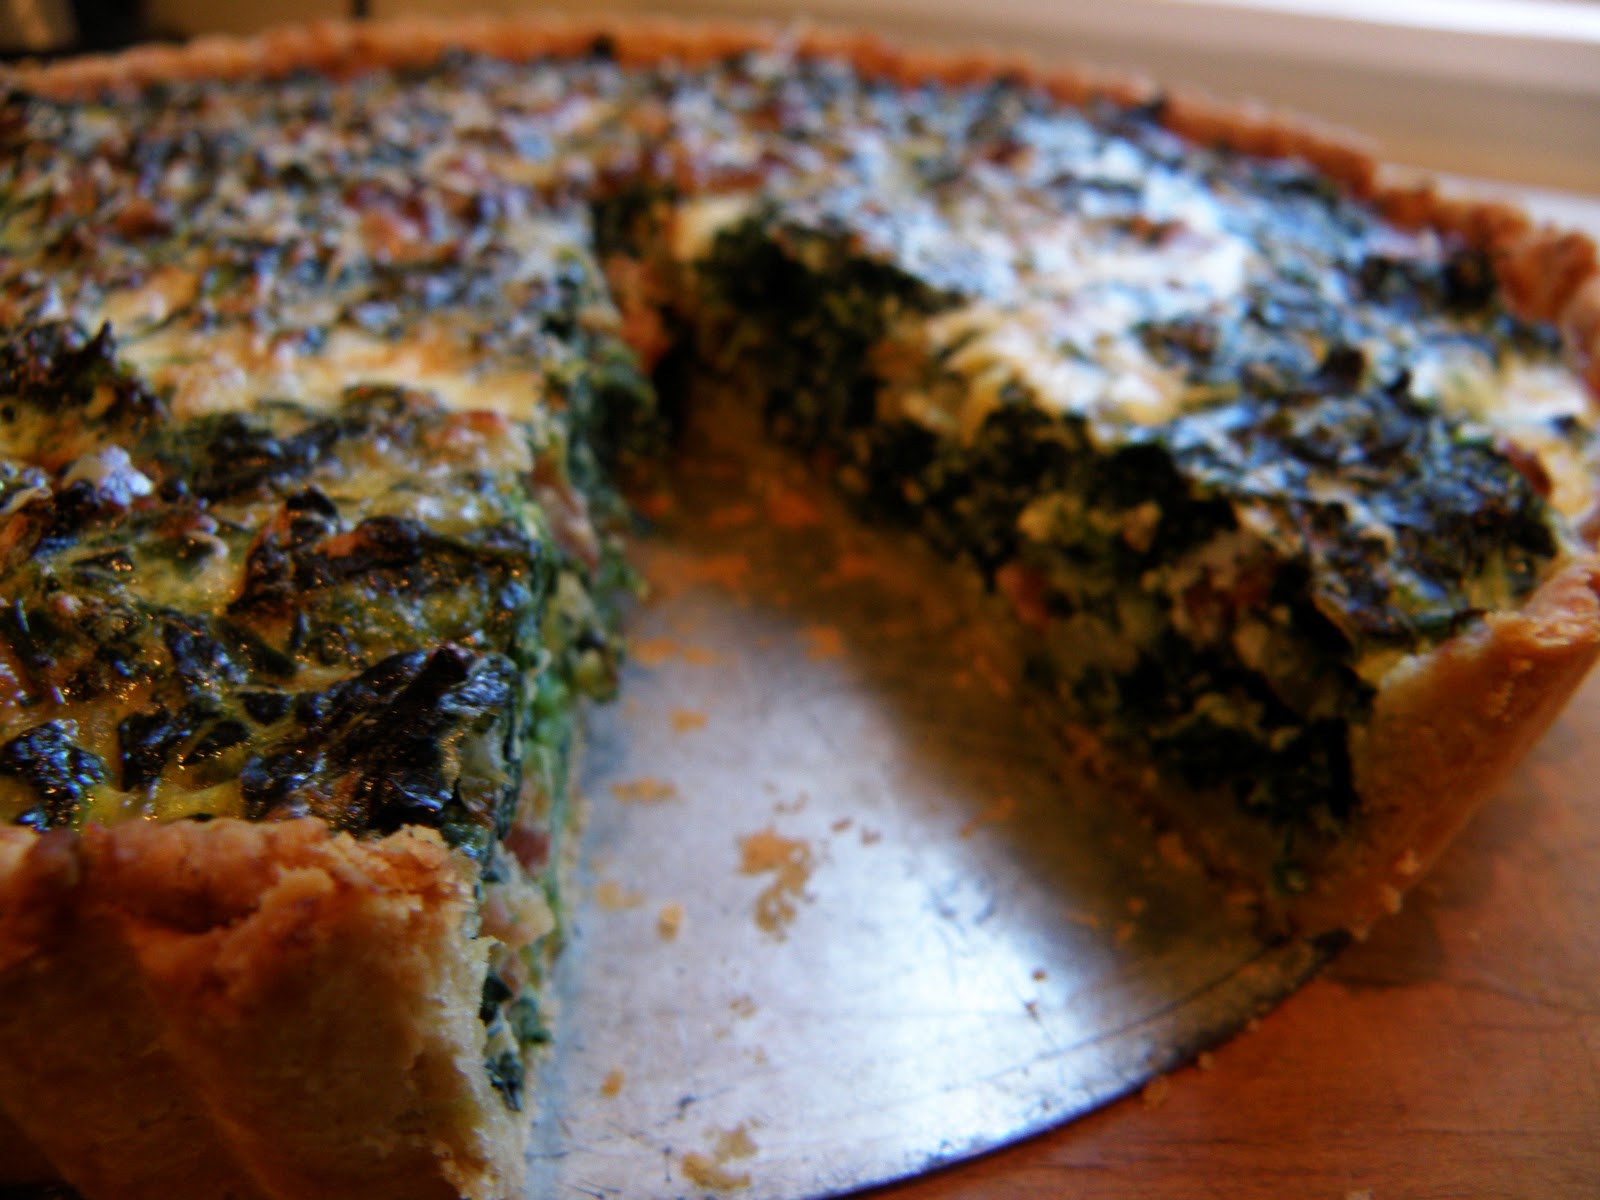
Spinach and Bacon Quiche ala Dorie Greenspan

Hmmm I forgot to take a photo while it was uncut...

Last night for dinner I planned to make this quiche. It did need forward planning as the pastry had to be made a good 4 hours before you needed it. While it was very easy to make in the food processor, the time required was the resting time. First it had to chilled for 3 hours in the fridge, then rolled out and the tin lined before you had to freeze it for a further hour. Having said that it was really good and tasted delicious. I think this will be my go-to pastry for tarts from now on. As you can see I really didn't have any problem with shrinkage which was due to not stretching it to fit in the tin.

Pastry waiting to go to the freezer

Partially baked crust
The filling was spinach, bacon, garlic and onion. I didn't have fresh so instead used a packet of frozen spinach which I defrosted and squeezed all the water out of before chopping it up. I used streaky bacon but as you fried it until it was crispy the fat was rendered out of it. The recipe called for 2 eggs and 2/3 c cream but I used 3 eggs and a cup of milk to get the calorie count down. I used more spinach than she said in the recipe but I really loved it however it really did need to extra egg to hold it altogether. As well as that the boys also loved it and I figured it was a good way to get more vegetables into them. Less spinach would also be good too... as would using the cream. I know quiche is a pretty standard dish but the star here is really the pastry. It was crisp and the the perfect carrier for the flavours of this dish. Yum!!! I would post the recipe but as  belong to FFwD we have unbdetaken not to publish the recipe.

Harry's portion with a tomato and cucumber salad