Showing posts with label Tarts. Show all posts

Tuesday, March 5, 2013

Plum and Pistachio Tart


I made this for when my sister in law came over for dinner with the most gorgeous little pork chop you could ever see (otherwise known as Ante our nephew), when her husband was overseas for work. I always like to serve a dessert and at the time I was inspired by the delicious plums I have got of George and Russ's tree and had bottled. So I cracked open a jar of these and used them but you could also just open and large can of plums from the supermarket and this would be just as delicious. I loved the green colour from the pitachios with the purple of the plums. It was a perfect end to dinner...not too heavy and not too light...in other words a definite make-again! 

Plum and Pistachio Plum Tart

1x 750g tin Black Doris Plums, drained
70 g pistachios
40 g ground almonds
1/3 c self raising flour
1/2 c caster sugar
100g butter, melted
finely grated zest of 1 lime and 1/2 orange
2 eggs, lightly beaten
1 tsp vanilla
2 Tbsp apricot jam, warmed (I didn't do this as I had just used all of my apricot jam up)

Preheat the oven to 180 C (160C fan forced) and grease a 23-24 cm tart tin (or a 11 x 35cm one) with a removable base. Line with baking paper.

Halve and stone the plums then put cut side down on paper towels to absorb some of the moisture.

Pu the pistachios and almonds into a food processor and process until finely chopped. Set aside 1 Tbsp and tip the remaining nuts into a bowl. Add flour, sugar, butter, zests, eggs and vanilla. Beat with a wooden spoon to combine and pour into the tin and spread it our evenly.

Arrange plums cut side down on the batter. You may not use them all. 

Bake 25-30 mins until top is golden and the filling puffed and firm tot he touch. Remove from the oven and brush with the warmed jam. Cool

After taking it out from the tin sprinkle with the reserved nuts and lightly dust with icing sugar. Serve with softly whipped cream or some nice yoghurt.


Monday, July 30, 2012

Apple Rhubarb Lattice Tart with Spiced Crust


I made this for dessert last night when my mum and step father came over for dinner. The recipe is from the latest Food magazine which used to be known as the Foodtown magazine. As a lot of you know I am an avid cooking magazine/cookbook buyer. I try not to be as I have far too many of them than I know what to do with but I really just can't help myself. I do subscribe to quite a few already but unfortunately for me, and fortunately for the magazines, I also buy them as soon as they come out. I have discovered though that the Donna Hay is available on my ipad and for much much cheaper so yes, I did also subscribe to that. Well at least it saves a bit of space and I was saving quite a bit of money (there is always a justification). So if you are interested go to itunes and search for Donna Hay and go for it. I do find that I refer to it less but at least I know I have it if I NEED it...as you do....!


Back to this recipe. It's best to start this in the morning so the filling has a chance to get nice and cold. If it is warm when you put it into the pastry, the pastry will melt and not taste as good. The pastry was easily made in my food processor. I found the dough a little soft so when I cut the strips I put them back in the fridge to firm up before I put them onto the tart. I served this with Chantilly Cream (basically cream whipped with icing sugar and vanilla paste to get the nice little flecked seeds look), and custard and we all really enjoyed it. I would make this again for sure.


Apple Rhubarb Lattice Tart with Spiced Crust


4 medium cooking apples, peeled and chopped
200 g rhubarb cut into large chunks
1/4 c each sugar and water


Put into a pot and cover until boiling. Simmer with the lid off until the fruit has softened. Cool completely.


Spiced Crust
300 g plain flour
1 tsp cinnamon
1/2 tsp mixed spice
150 g each brown sugar, cold butter
2 egg yolks
2 Tbsp milk


Put the flour, sugar and spices into the food processor and blitz to combine. Add in the butter which has been cut into chunks and process until it looks like breadcrumbs. Add the yolks and milk and process until it just forms a ball. Wrap in clingfilm and rest int he fridge for about 30 mins. Then grease and a 23 cm loose bottom tin and line with the pastry. I rolled mine out and then patched it up as it was a bit soft.You will use about 2/3 of the pastry, then roll out the rest and cut into strips. I put mine back into the fridge for about an hour along with the strips.


When you are ready to cook, preheat the oven to 180 C. Fill the pastry with the fruit and then arrange the strips over in a lattice pattern. Bake about 40-45 mins. Leave in the tin about 5-10 mins then remove, dust with icing sugar and enjoy.

Friday, October 28, 2011

Key Lime Pie


Harry with Bobby

In the tin
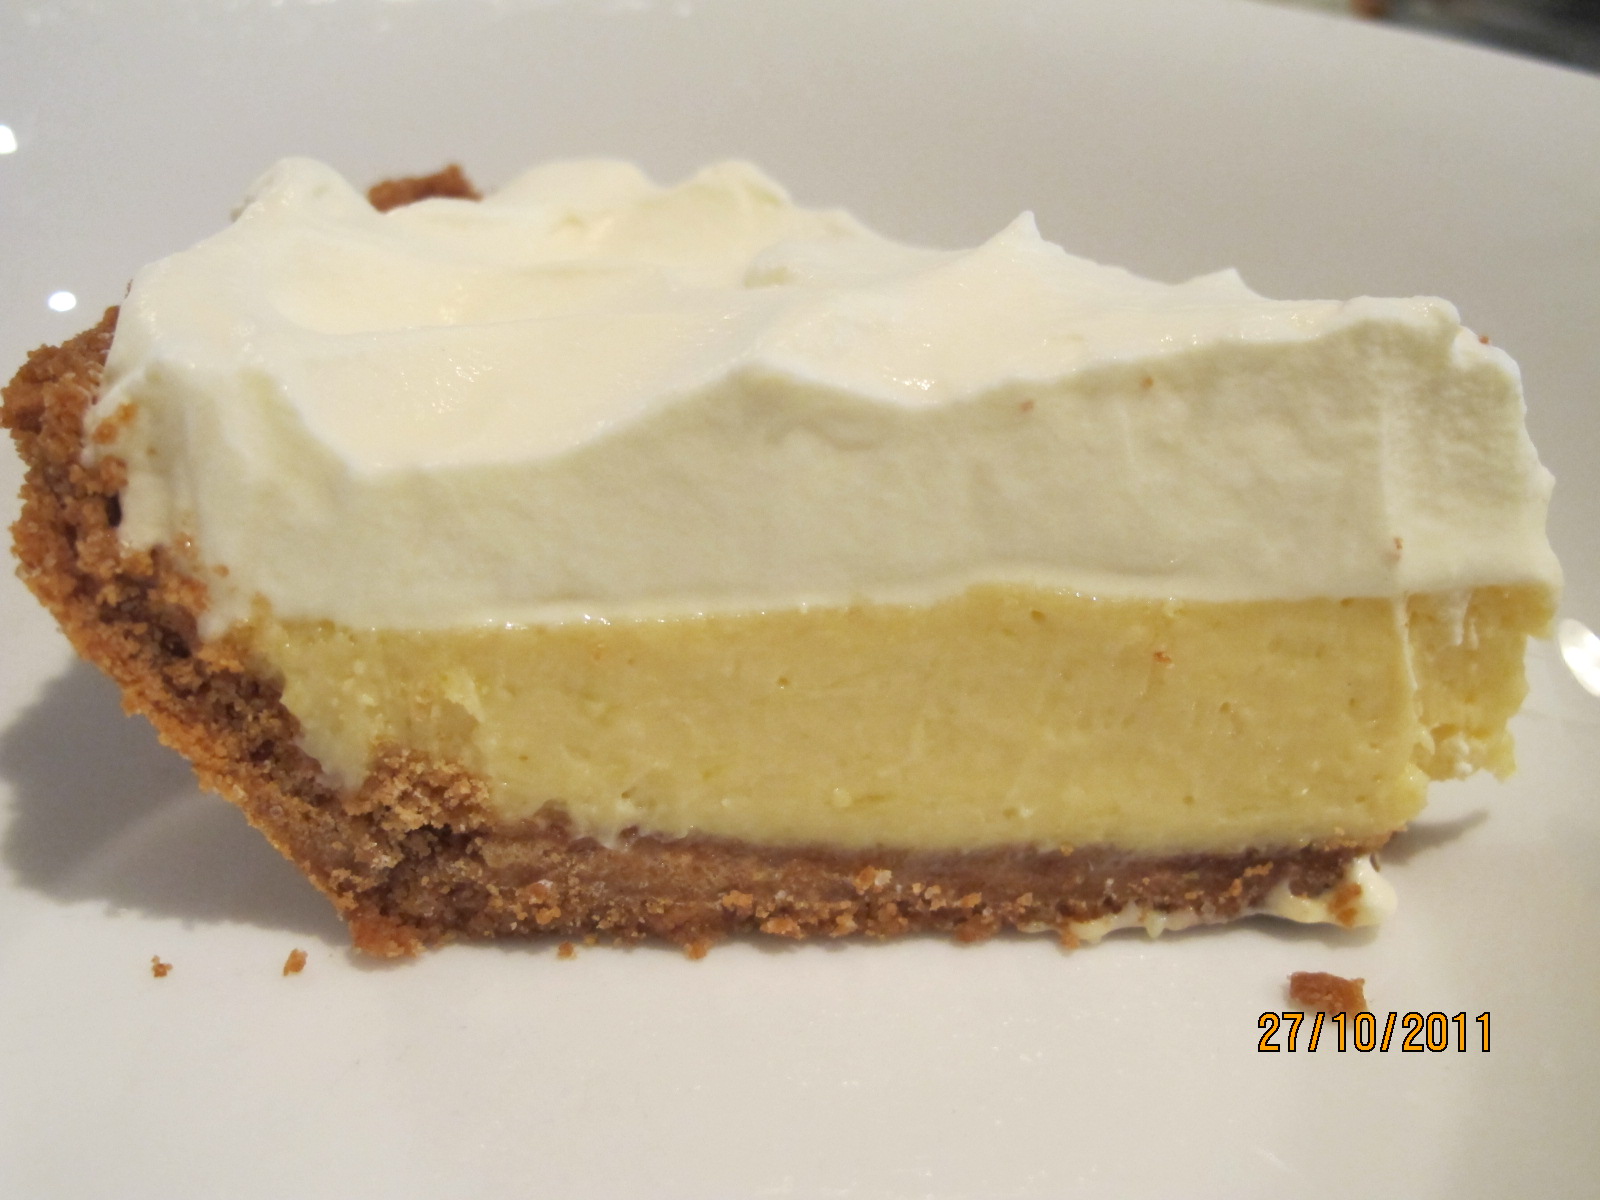
Last night was my step-fathers birthday dinner. He is from the Southern part of the USA so I wanted to make a dinner with that sort of influence. For dessert I remembered him telling me ages ago that Key Lime Pie was his favourite so I knew I had to make that for dessert. Having never made this before I really had no idea what it should have looked and tasted like. We don't get key limes here so I had to use normal limes (which are horrendously expensive at the moment). As well as that we don't have graham crackers here so I had to use wholemeal digestive biscuits which apparently are quite similar to them. This was a really easy recipe to make and I have to say it tasted pretty good too. While I would have liked to pipe the whipped cream on top so it looked pretty I ran out of time so it just spread on. Excuse the photos too but I didn't have time to zhoosh the pie up so had to quickly snap a couple as best I could. This pie is so good. I would really recommend it. Bobby said it tasted just like it should which was music to my ears!


If you want the recipe go here.

Sunday, May 15, 2011

Baking for Nightshift- Brulee Lemon tart

After being 'Brulee'd'


Just cooked 

The one small individual one I made


I have made this tart a number of times over the years. I originally got the recipe from a Gourmet Travellor magazine (I think it was from a 2002 issue). It's a fantastic recipe which is easy to make and has a lovely custardy, light texture. The original recipe does not call for the top to be brulee'd but I thought I would give a go with this one to see if it made it taste better or if it added something else to the already delicious tart. The recipe for the base is also a good one but this base is one I have had in the freezer for a little while when I made my last batch of Dorie Greenspan 'good for anything sweet pastry' (at least I'm sure that is the name of it). I had lined this rectangle tin as well as one individual tin with the leftover dough I had. 


Tonight is the last night for one of our nurses called Stephanie. She has been in NZ for ages now but homesickness has finally got the better of her so she and her family have decided to move back to England. She's a lovely person and a fantastic nurse so we will all miss her a lot. Another thing she is, is a fantastic baker so I'm hoping this will meet with her approval. When someone leaves our unit we all bring food and have a feast to say goodbye on their last shift. As I am onto my third night duty in a row I needed to make something that wasn't too labour intensive but delivered a nice flavour hit so I thought this tart might do it. As I had already made the pastry, all I had to do was blind bake it and make the filling, then get out my brulee torch and work some magic. I find that using icing sugar gives the best crunch on top. It melts fast so you are less likely to burn the tart or cook the eggs in the filling more than is necessary. Anyway the proof will be in the pudding when we eat it later I suppose. If you don't have a torch, don't worry as this tart is amazing just as it is especially with some raspberries on the side and some softly whipped cream.


Lemon tart


Pastry


170g plain flour
80g icing sugar
2 Tbsp and 2 tsp ground almonds
pinch salt
100g chilled and chopped butter
1 egg, separated 


Combine flour, salt and almonds in a food processor and blitz to mix. Add butter and egg yolk and about a tablespoon of chilled water. Process until just coming together. Shape into a disc, cover with clingfilm and put in the fridge for about an hour to rest. Line a 23cm tart tin with a removable bottom and freeze 30 mins. 


Bake blind for about 15 mins in a 200 C oven. Remove the beans and brush the lightly beaten egg white over the base and put back into the oven for another 5 mins.


Filling


6 eggs
220g caster sugar
200ml cream
grated zest and juice of about 3 lemons (depends on the size though)


Combine eggs and sugar and whisk until smooth. Whisk in zest and juice followed by the cream.


Pour into the warm tart case and bake about 30-40 mins until just set in a 150C oven. 

Thursday, September 16, 2010

Double Chocolate and Vanilla Poached Pear Tart

 
Hi everyone and welcome to my first blog post. Even though this will be a food and family blog my first post will be food related (as indeed most will be). I know I'll be blundering my way through this until I get the hang of it but please bear with me until I figure it all out. I was reading through the (mostly food-related) blogs I regularly follow and found a recipe for a similar tart which I based this recipe on. Here is the link to the original blog I found this on called  Confessions Of Tart. As I was having some friends over for lunch the other day I thought this would be perfect as I could make it over a few days therefore reducing the workload somewhat. I started off by poaching some pears in a lovely vanilla syrup. They kept well in the fridge for a few days and I think the flavour actually improved as I left the vanilla pod in the syrup. Here they are sitting in the bowl...


I also made the tart base earlier and stored it in the freezer to be baked on the day. The filling was a lovely decadent ganache-style chocolate custard which was easy to make and tasted a bit like a ganache-type of brownie. I used Whittakers dark block with 50% cocoa as I find darker chocolate a bit too bitter and this was what I had in the cupboard but I usually go for the 62% block. Here is it waiting to go into the oven with the pears looking a bit messy...


And just out of the oven looking slightly cracked on the top (as the recipe stated), but still a little gooey...


The girls loved it. I served it with softly whipped cream and that was all it needed...


Double Chocolate and Vanilla Poached Pear Tart

Base (adapted from Dorie Greenspan)
1 1/4 c plain flour
1/4 c cocoa
1/2 c icing sugar (or confectioners sugar)
120 gm cold butter (I used salted butter)
1 cold egg lightly beaten

Mix all the dry ingredients in the food processor and pulse until combined. Cut up the butter and pulse until it resembles breadcrumbs then slowly add the egg until it just starts to come together. If it's too dry you can add a bit of iced water. Tip into a loose-bottom flan dish and lightly press...try not to overwork it. Put in the freezer for at least 30 minutes or for a few days if you like.

Bake blind at 175 C for about 10-15 mins then remove the beans and brush with the slightly beaten spare egg white for a further 5 mins. 

Vanilla Poached Pears
4-5 firm pears 
5 c water
1 1/2-2 c water
Vanilla bean with seeds scraped out and pod

Put water, sugar and vanilla into a pot and bring to the boil stirring so the sugar dissolves. Add the halved and cored pears and poach at a low boil until they are tender. Mine took about 30 mins. Set aside to cool or store in the poaching liquid.

Chocolate Custard
150 gms dark chocolate chopped
3/4 c cream
1/4 c caster sugar
1 egg plus one egg yolk  (don't throw away the white)
1 tsp vanilla extract

Melt the chocolate and cream together in a double boiler then add the sugar making sure it dissolves. Cool. Whisk the egg and yolk together with the vanilla then temper them with about a 1/2 c of the chocolate mixture. Finally add the rest of the chocolate and combine well.

To Assemble
Cut the pear halves either vertically or horizontally keeping one side or end in tact. Fan out. Pour the custard into the base then place the pears on top. Bake for around 45 min. Cool for 10-15 mins in the tin then remove from the tin. Finally ENJOY!