Monday, May 28, 2012

Baking for Nightshift- Lemon Syrup and Coconut Cake


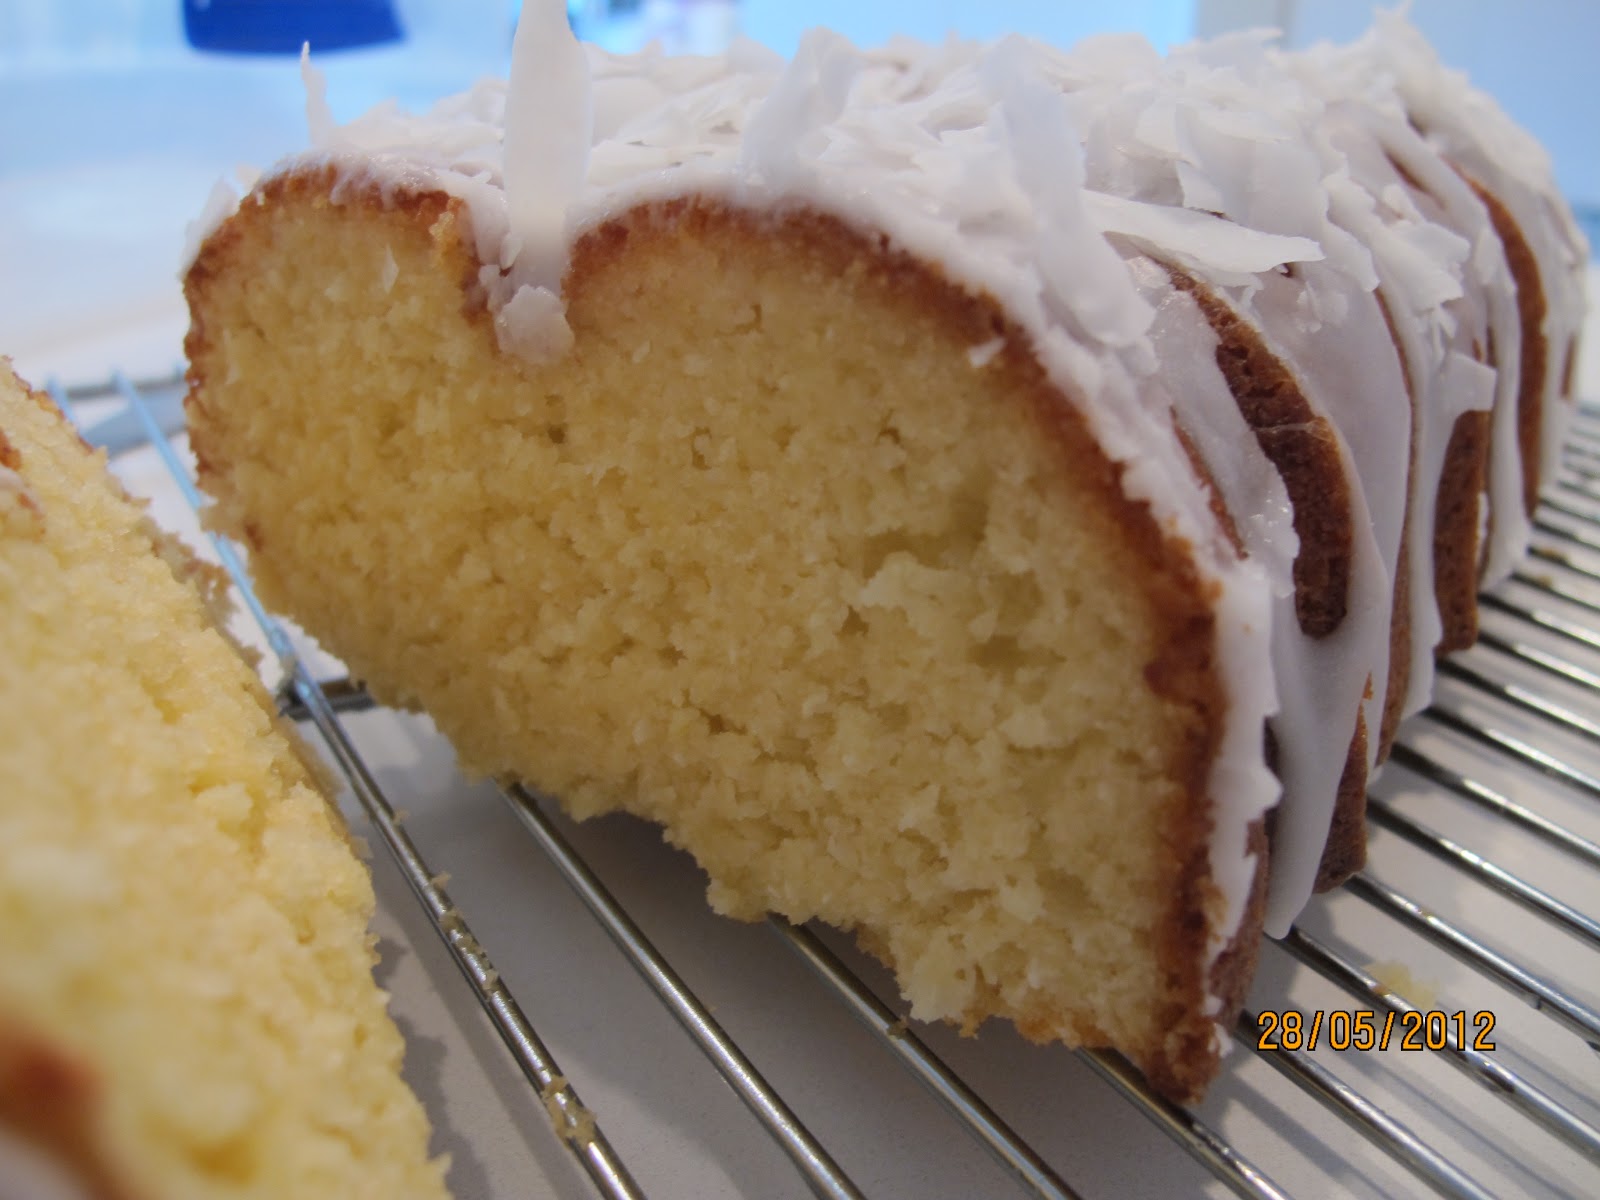
I found this recipe in a long forgotten about Sophie Grey book the other day. When it came to deciding what to take to work tonight I remembered I had seen it and abandoned my thoughts of making a lemon slice (I know I'm all about lemons at the moment!), and went straight to this. Actually I think having had a slice of my boss Mariam's delicious Lime, Coconut and Passionfruit cake the other morning as I was finishing my shift, reminded me how good the combination of citrus and coconut is, so I was inspired to try this recipe. This was very easy and the method different to how I would normally make a cake. I wondered if it would work given that the method is so different from what I would think would make a good cake, but it actually tastes lovely. I added a lemon drizzle icing and some coconut flakes to emphasise the coconut in the cake (Mariam had some on her cake and it looked really lovely so sorry Mariam...another idea nicked!). I also made it in my lovely Bundt loaf tin and while the recipe calls for a 20cm tin I think it would be better off in a 23cm tin. 

Lemon Syrup and Coconut Cake


350 g flour
3/4 c sugar
pinch of salt
100 g coconut
3 tsp baking powder
200 g butter
 zest and juice of 2 lemons
2 eggs
300 ml milk


Grease and line the base of a 20 or 23 cm tin (or else prepare a bundt tin) and preheat the oven to 180 C.


Put the flour, salt, baking powder, coconut and sugar into a food processor and pulse to mix. Add in the cubed butter and process so it looks like breadcrumbs (or you can rub in the butter with your fingertips).


Tip into a large bowl, make a well in the middle and add in the lemon juice, zest, eggs and milk and mix together. It needs to be a soft dropping consistency.


Pour into the tin and bake 40-50 mins.


Turn out of the tin after about 15 mins and brush over a syrup made with 1/4 c sugar, 1/4 c lemon juice and a splash of water. Heat the syrup ingredients until the sugar is dissolved. 


I drizzled mine with a runny icing made with icing sugar and lemon juice to get the right consistency and sprinkled it with some coconut flakes.


Gluten Free Blueberry and Lemon Muffins


Dons has been on at me to do some baking for her for a while now. One of the things she has wanted was some Blueberry Muffins. I have to admit that while I am a pretty good baker, muffins are not my strong suit. For some reason I can't stop mixing them (it's the lumps!), so they often turn out to be not as light as they should be. So this coupled with the fact that it needed to GF, was enough to make me put it off for as long as I could. The other day, I finally got some courage and decided to give them a go. I ended up using a normal recipe and substituting the flour with GF flour. I also added in some lemon zest to give it an extra bit of something. Dons said they were delicious and most importantly they were light! Wow maybe I have finally ended the too-dense muffin period!? I made half the recipe in case they were a disaster (I got 6 muffins) but will give you the whole recipe instead.


GF Blueberry and Lemon Muffins


2 eggs
1 c sugar
1/2 c vegetable oil (I used Grapeseed)
1/2 tsp vanilla
2 c GF flour (I used Orgran brand)
1/2 tsp salt
1/2 tsp baking soda
1 tsp baking powder (I added this in as the baking soda didn't seem to be enough)
1 c sour cream
1 c frozen blueberries
Zest of a large lemon


Preheat the oven to 200C and line muffin tins with cases.


In a large bowl beat the eggs, zest and sugar together. Slowly beat in the oil then stir in the vanilla.


Sift in the dry ingredients and stir in the sour cream. Gently fold in the blueberries. I made sure to not overmix it this time.


Bake about 20-25 mins. Remove from the tins to cool.


Baking for Nightshift- Lemon Syrup Yoghurt Cake and Afghans


The bigger Chrysanthemum Cake 


The other week I was working with one of my oldest friends Leigh Leigh and I go back a good 24 years so I have known her for well over half my life. What an amazing thought to have known and be friends with someone for such a long time. So that night I decided to make a couple of different things to take to work to celebrate. First of all was my Lemon Yoghurt Cake which you can find here and these Chocolate Afghans which are here. I also made four individual Rose shaped cakes for Leigh to take home with her. Happy Birthday Aunty Leigh xxx


Vanilla Creme Brulee


This year for Mother's Day I decided I would cook dinner instead of us going out. I know this might seem a bit odd as on this day we are supposed to relax and have lots of treats. BUT I actually really enjoy cooking and my most relaxing thing is to spend time in the kitchen. So for dinner I made Lamb Shanks in a Port sauce, creamy Potato Mash and Pea Puree (my new favourite way to have peas). Dessert was this delicious Vanilla Creme Brulee which is one of my favourite desserts. It also happens to be Harry's favourite too so he was thrilled when I told him this was what I was making. After looking at a ton of recipes I ended up making up my own (taking a bit from here and there) and boy oh boy was it good! No it is most certainly NOT WW-friendly but hey, it was Mother's Day!


Vanilla Creme Brulee


500ml cream
100ml milk
5 egg yolks
100 g caster sugar
1 1/2 tsp good vanilla extract (I would have used beans or vanilla paste but have just run out so had to use a fantastic extract instead)


Heat the oven to 140-150 C


Gently heat the milk and cream so it is almost to the boil. Add in the vanilla.


Whisk the egg yolks with the caster sugar until pale, then slowly add the heated cream/milk mixture. It's a good idea to temper the eggs first by adding in a bit of the heated milk and mixing it in first. This means you are less likely to cook the eggs than if you added all the hot cream at once. 


Sieve into a clean pot and heat gently stirring all the time until the custard  starts to thicken. Pour into ramekins (I got 4 good sized ones but it could have stretched to 5). Put into a bain marie (which is a water bath)....basically you put the ramekins into a bigger roasting dish and pour in hot water until it comes halfway up the sides of the ramekins.


Bake about 20-30 mins until the centres have a little bit of wobble to them when you gently jiggle them.


Remove to cool then put into the fridge for at least 3-4 hours (but preferably overnight). 


When you are ready to serve sprinkle the cold custards with icing sugar. I have used caster sugar in the past but it takes longer to caramelise than icing sugar. Go over the top with the blow torch until melted and crunchy.


Enjoy, enjoy, enjoy!


Sunday, May 13, 2012

Baking for a Weekend Off and Crazy Cake


As this is my first full weekend off in 3 weeks, I wanted to do some baking to last and to treat the boys with. I probably went a little overboard and made too much, but when baking is your relaxation, that's not hard to do. I made my most favourite Ginger Crunch which I love to make so it is thin, crunchy and has just enough topping to complement it's gingery deliciousness rather than swamping it. I also made a half a batch of Annabel Langbein's Chocolate Chip Cookies which not only made a huge amount, but a really, really good. 


As an after thought I also whipped up this Crazy Cake which is an old Alison Holst recipe. Harry has had this cake at his friend Meg's birthday and fell in love with it. While it looks like a chocolate cake it is actually spiced with cinnamon and ginger giving it a more complex flavour. It's also egg and dairy free so perfect if you are baking for someone who may have these allergies. Now I have baked so much the neighbours are going to benefit as I re-home some of it.


Crazy Cake (Alison Holst)

1½ c plain flour
2 Tbsp cocoa
1 tsp each cinnamon and powdered ginger
1 tsp baking soda
1 tsp salt
1 c sugar
½ c oil
¾ c water
2 Tbsp vinegar
1 tsp vanilla essence


Heat oven to 190°C , with the rack just below the middle. Line the bottom and two opposite sides of a 20cm square pan with baking paper. Butter and flour the uncovered sides of the pan, or coat with non-stick spray.


Sift the first six ingredients through a sieve over a fairly large bowl. Stir in the sugar with a fork, leaving a depression in the centre. Measure the oil and add it to the dry ingredients, without stirring. Add the vinegar and vanilla to the measured water, then tip them into the flour-oil mixture. Stir with the fork until the mixture is smooth and no dry lumps remain.


Pour the mixture into the prepared pan and bake for 30 - 40 minutes, until the centre of the cake springs back when pressed, and a toothpick or skewer comes out clean. Leave cake in the pan for five minutes, then turn out onto a wire rack and leave to cool. Dust with sieved icing sugar or ice with chocolate icing. You can also top with whipped cream and fresh or partly thawed raspberries; sliced drained canned peaches; or sliced bananas and raspberry jam.


No Knead Bread....Just like Vogels


Today is Mother's Day and while I started the day with the obligatory and wonderful homemade Mother's Day cards (I LOVE homemade things from my babies), I have so far spent the day cooking. We decided that we would rather stay home for a nice dinner than go out anywhere, which I know plenty of you mothers out there will find a little difficult to understand. However booking anyway for dinner on Mother's Day is pretty difficult and as I am more than happy to cook, it just doesn't seem like a chore to me. 


So for dinner tonight is Lamb Shanks in a port sauce(a treat here in good old NZ as lamb is ridiculously expensive...crazy considering we have far more sheep than people and lamb is more more affordable overseas than it is here!), potato mash and pea puree. For dessert is a decadent and most definitely non-WW-friendly Vanilla Creme Brulee which I will post about once it has had its sugar crust and I have tried it tonight....to make sure it's even worthy of a post. Of course we will have some nice bubbly and I have set the table with my Grandmother's Royal Doulton dinner ware and her crystal wine glasses and put candles all around the room.  


I know you will be wondering what this has to do with bread! Well all you mothers and non mothers out there....THIS is my gift to you! Whatever you do you really must make it. You will revel in how easy it is to make and how amazing it is to eat. You will say goodbye to Vogel's bread at a cost of over $4.50 per loaf once you have discovered this and hello to the Domestic Goddess you are or have always wanted to be. The only advise I have is to make sure you have a BIG loaf tin. I thought mine was big but yes it did overflow. It still worked out well as I just transferred some of it (and the spilled stuff), to a small loaf tin but next time I know to either make 2 small one or else invest in an even bigger loaf tin than the one I already have. The recipe can be found here at one of my favourite websites to visit called Foodlovers. Now don't say I never give you anything....


Friday, May 11, 2012

Gooey Caramel Anzac Slice


Just a quick post as I seem to have a real backlog of things to post about...and my friend Adele from work will hassle me until I catch up (so this is for you Adele ;-)). All I'm going to say about this recipe is to make it. It's delicious, rich and has that Anzac vibe about it. I actually made it for the family picnic we had on Anzac day so that was a while ago but it went down very well. 


Gooey Caramel Anzac Slice (Foodtown magazine)


Base
1 1/2 c flour
1 tsp baking powder
1/2 c brown sugar
140g butter, melted


Caramel
1x can of condensed milk
2 Tbsp golden syrup
50g butter


Topping
1/2 c each: thread coconut (I used desiccated), rolled oats, brown sugar
30g butter


Preheat the oven to 175C and line the base of a 19cm x 30cm slice tin with baking paper.


Make the base by combining the flour, baking powder and brown sugar together then adding the melted butter and stirring well until it's combined. Press evenly into the tin and bake 10-12 mins until pale golden and just set.


Make the caramel by melting over a medium heat and stirring until the mixture thickens and is golden. Cool about 5 mins while you make the topping.


Make the topping by combining everything and mixing well.


Pour the caramel over the par baked base and carefully sprinkle over the topping pressing it into the caramel lightly. Bake 10-15 min until golden and bubbling. Cool before cutting.


Thursday, May 10, 2012

Early Mother Day Muffins Courtesy of Harry

Harry's Lemon Yoghurt Muffins


Harry with his amazing baking

As I have just finished three (long) night shifts the boys have been at their dad's house while I was working. When I got to Harry's school to pick him up this afternoon, having not seen him for a few days, I was thrilled to receive an early Mother's day present that he had made himself while he was at his dad's. Harry knows I love lemon so he went online to one of my favourite websites called Foodlovers (which, by the way, you really should visit because it's a fantastic resource and has fabulous forums), to find a recipe for Lemon Yoghurt Muffins. They taste very yummy and I was very very happy to receive such a thoughtful gift. Thanks Pup and remember Mummy loves you SO much! xxx


Wednesday, May 9, 2012

Tan Slice....The Redemption


SO after the disasters of the previous post I am happy to give you THIS recipe. I also made this slice as I had wanted to take a couple of things to work that night. I was so glad I did. This Tan Slice is fantastic and this was the star of the night. I love all things caramel but I'm not so keen on the caramel slices with chocolate on top. The good thing about this, aside from its sweet decadence, is that you can use dark or milk chocolate chips and if you wanted to you could put in more than the recipe states for a stronger chocolate hit. This recipe also differs from similar slices in that the base isn't precooked. I think this adds to it's squidgy richness and makes it even more luscious. SO here is the recipe to redemption.

Tan Slice


180g butter
½ c White Sugar
½ tsp vanilla extract
2 c flour
1 tsp baking powder
½ c chocolate chips

Caramel1 tin condensed milk
75 grams butter
2 tablespoons Golden Syrup


Pre-heat your oven to 180°C and line a 25cm x 15cm (or thereabouts) slice tin with baking paper.

Cream butter and sugar, then add in vanilla.  Sift in the flour and baking powder and mix until combined. Press two thirds of the mixture evenly into your baking paper lined tin and set aside in the fridge. 


To make the caramel melt together the condensed milk, golden syrup and butter in a small pot until it is lightly golden and slightly thickened (don't overdo this as it will cook more once it's in the oven). S
tir constantly as it can catch and burn reasonably quickly.  Pour the caramel over the base.


Mix the remaining base mixture with the chocolate chips and crumble over the caramel.

Bake in your pre-heated oven for 15-20 minutes. Remove from the oven when the top of your slice is golden and leave in the tin to cool completely before slicing into squares.


Tuesday, May 8, 2012

Epic Failures in the Kitchen

I would say that every baker has had a bad day in the kitchen. We have all had failures...some epic and some just not good. Yesterday was one of those days for me. As I was working last night I spent the afternoon in the kitchen baking to take some treats in for the girls who were also sharing the same nightshift-fate. Luckily for me I made a slice (to be posted about next) which was totally delicious and redeemed me somewhat. However I had spotted a couple of recipes on the blogs I follow which I thought sounded and looked great. The first was a Feijoa, Banana and Chocolate Bundt Cake. OMG I should have trusted my instinct and have known this mixture sounded wrong. It had too much moisture in it and too much fruit and you can see the evidence in the photos below. I knew things were going to be bad when it just wouldn't cook. The recipe said 45 minutes and after 1 1/2 hours with the skewer still coming out wet things were not looking good. I found the recipe here. Her one looks amazing so I might have to ask her what I did wrong. This was what I ended up with...


About 10 mins after coming out of the oven....not looking good

Looks good turned out.....

Stodgy, wet, inedible mess!
So after that fail I thought I would try another cake. This cake while not a total disaster was dry and the icing set like hard toffee and needed a jack hammer to break it. I loved the story behind this cake and the name of it  Vintage Goldenglow Cake also appealed. While the cake was easy to make, I must have over boiled the icing (I did boil it for the time stated), so when I went to cut it, it was pretty much impossible...although it did taste ok if you like sugar This recipe was found here but I won't be making it again. Take a look at the post though because it makes for a lovely read.


You can see what I mean by the hard icing (which got even more hard))

Looks dry!
When this happens it's important to not loose heart and move on to the next recipe. Remember we are all human....and there are some recipes out there that just don't work!


Monday, May 7, 2012

Custard Kisses


Well I seem to have a huge backlog of things to blog about. Life has been frantically busy and there has been little free time for things like blogging. No doubt other bloggers have their down times too when life just gets in the way so I'll chalk it up to that. While I would love to post the recipe for this, for the life of me I can't remember where I got it from. This is the downside to having far too many cooking magazines, recipe books as well as all the recipes I have bookmarked online and the internet cooking/baking sites I regularly visit. I promise when I do remember where I got this recipe from I will post it, even though I have already wasted far too much time trying to find it! I do know that they had custard powder in both the biscuit and the icing and I have to admit to a real weakness for good old Edmonds custard which was probably what drew me to the recipe in the first place. Edmonds custard takes me right back to my childhood where if we were lucky enough to have pudding, it was often Edmonds custard and tinned fruit. 


Anyway I do remember these biscuits were delicious. No doubt the whereabouts of this recipe will hit me in the middle of the night so when it does I'll make sure to post it because you really will want to make these biscuits.


And an update today 11/5/2012 is that I found the recipe! Of course it was right in front on me but that's usually how it is isn't it?


Custard Kisses (Foodtown Magazine)


250g butter
1/2 c icing sugar
1 1/2 c flour
1/4 c each: custard powder and cornflour
1/2 tsp baking powder


Filling
50g butter, softened
1 1/2c icing sugar
2-3 Tbsp custard powder
1-2 Tbsp hot water


Preheat oven to 160C and line baking trays with baking paper.


Cream butter and icing sugar until light and fluffy. Sift over the flour, custard powder, cornflour, baking paper and mix until a soft dough forms.


Roll into little balls or else pipe into star shapes (my mixture was too firm to pipe).


Bake about 15 mins or until firm and starting to colour around the edges. Leave on the trays to cool.


Mix together the ingredients for the filling but add the water slowly so it isn't too runny. Sandwich the custard kisses together.