Thursday, February 10, 2011
Baking for... Carrot Cupcakes
Yesterday at work we were running the New Zealand resuscitation Council for Neonates day which can be rather taxing for everyone (us and the people doing the course). Each time I like take some cupcakes with me to help to lighten the day a little and maybe sweeten it a bit. As I had a mad baking day the day before I wanted something that was easy but tasty. I went to my favourite cupcake book called 'Divine Cupcakes' by Tamara Jane and found this recipe. I halved the recipe and still got 24 cupcakes out of it. Of course everything tastes better with cream cheese icing so I piped some of that on then sprinkled it with a little cerise rainbow dust (edible glitter) which I have been dying to use since I bought it. The girls seemed to like them and the recipe made a lovely light but nicely flavoured cupcake.
Carrot Cupcakes ('Divine Cupcakes'- Tamara Jane)
280 gm flour
1 tsp baking soda
1/2 tsp mixed spice (I made it a generous half)
1 c vegetable oil
260 gm brown sugar
3 eggs
300 gm grated carrot
75 gm chopped pecans
60 gm sultanas
finely grated zest of a lemon
Oven to 180 C and line 24 muffin tins with cupcake papers.
Sift together the flour, soda and mixed spice. I a separate bowl, beat the oil, sugar and eggs until it is creamy and thick.
Add the grated carrot,pecans, sultanas and zest then beat on a low speed until combined.
Add the flour mixture and beat on a low speed unbtil thoroughly combined but do not overmix.
Bake 22-25 mins and remove from the tins to a wire rack to cool.
Cream Cheese Frosting
60 gm butter softened
200 gm cream cheese
vanilla extract
3-4 c icing sugar
Mix the butter and cream cheese together until well mixed. Add the icing sugar and beat until light and creamy.
Tuesday, February 8, 2011
Lemon Macarons for George
Today is my boys dad's birthday. Lucky George gets to be one year older...better him than me. Mind you it's my turn soon so I shouldn't be so smug! George is a great dad to Reuben and Harry so I wanted to give him something homemade as I think it's always a bit more special when someone thinks enough of you to make the effort, and put thought into, making something. I know George has a bit of a sweet tooth and I also know he has a weakness for all things lemon. One of the many books I got from Amazon.co.uk recently is this fantastic little book called 'Mad About Macarons'. I haven't eaten a lot of these in the past but there are some things you just know you will love. Incidentally the whoopie pie is another of these for me and I also bought a book on these too so keep an eye out for a whoopie pie post.
Anyway I digress...one thing that really drives me mad is when people misspell or mistake macarons for macaroons when they are two totally different things. Macarons are way more labour intensive than macaroons and I think much, much nicer with way more return on the hard work. As this was my first attempt I was really quite pleased with how they turned out. They may not be picture perfect and not exactly how they are meant to look but I'm sure with practice they will end up being much better to look at with a flatter and smoother top.
The macarons themselves aren't all that hard to make I think it's more getting the process right. Had I known better I would have added more colouring to the egg white mix to get a more vibrant yellow. As well as that I think my mixture could have been more glossy and maybe mixed a bit more to get the air out which may have given me those fatter and smoother tops. The filling was an interesting mix of a custard and butter icing. The butter is creamed and left while you boil milk and lemon extract. Once that boils you mix it into an egg yolk, some custard powder and icing sugar then thicken it on the stove again. Once it cools you beat in the creamed butter and some lemon zest. The shells are then filled and put into the fridge for at least 24 hours for the two to make a happy flavour and texture marriage. Of course in the interest of science we tried one straight after it had been filled, then another 3 hours after. I could tell that the author was right and the longer they are left the better the flavour and texture has to develop so it is nice and slightly crispy on the outside and soft and beautiful on the inside. I'll look forward to trying one tomorrow...and the next day too ;-)
Anyway I think George will like them and I'm really pleased that I have finally had the chance to make these after all this time of wanting to give them a go.
Happy Birthday George xxxxx
| Just piped onto the trays |
| After 40 mins sitting time |
| Just baked |
| Packaged up |
Sunday, February 6, 2011
Churros Con Chocolate
Now I'm going to start this post with a bit of a disclaimer. I really had forgotten that I would be photographing this until I had already made them and was about to let the boys loose therefore the photos are a bit haphazard.
One of the best desserts I have had is at a place called 'The Engine Room' which is a little bistro-type of place in suburban Northcote. The food is fantastic and this dessert has been on the menu ever since it opened. After dinner it can be a hard thing to get through this as it is very sweet and very rich...perfect even if it is such a hardship to eat! Their version comes with little round doughnuts dredged in cinnamon sugar and served with a glass of very thick chocolate mixture topped with cream to dunk the doughnuts into. Now I know that traditional churros are pushed through a piping bag with a large star tip but as they serve theirs like this is saw no point in sweating the small stuff about the shape of the doughnuts. As well as this I have quite a few recipes for churros but remembered about this one I had seen in a long ago Delicious magazine I had bought (August 2006 to be precise). When I went back and found it I could hardly believe that the recipe is actually the one from The Engine Room...how lucky is that! Next weekend we have my best friend and her family over for dinner and I know she loves this dish too so I thought, at the last minute, that I would trial it before making it when they come over.
The chocolate mixture for The Engine Room version is made a few hours before you need it so it sets to a light pudding texture and as I didn't have that sort of time I used the chocolate mixture from Nici Wickes book 'World Kitchen', (I wasn't keen on her churros recipe as it was more like a choux pastry) which is more like a thick hot chocolate. The chocolate mixture was fantastic and very easy to make. The churros recipe was also very easy to make. I don't ever deep fry so am not all that onto it (not that it is hard). I had just bought a candy/deep frying thermometer but when I put it into the oil as it was heating the silly thing broke...on it's first use, (you clearly get what you pay for)! So I used the fry-a-piece-of-bread technique where if a cube of bread browns in 30 secs then it's ready). However the first batch I made too big and they browned too fast before cooking through properly. I put them back into the oil but they had some sugar on them and that explains the black bits you can see on the doughnuts. Yes I should have known better but these things happen when your deep frying in temperatures of around 30 C with massive humidity. The rest of them I made smaller and turned the heat down and they came out just like the photo.
The boys LOVED these! They especially loved having their own little dish of chocolate sauce to dunk the doughnuts into. Despite how it looks the photo of the dunked doughnut was not a case of double dipping, it had been cut in half then dunked for a last minute photo. Give these a go and learn from my errors, ie don't refry with sugar on the outside, and get your temperature and doughnut size not too big.
Churros Con Chocolate
Churros
1/2 c caster sugar
1/2 tsp vanilla
1 egg
20 gm butter, melted
1/2 c milk
1 1/4 c flour
1 tsp baking powder
1/2 tsp salt
canola oil for deep frying
Whisk the sugar, vanilla, egg, butter and milk in a bowl. Add combined flour, baking powder and salt and stir until smooth, adding extra flour (I needed another 1/4 c), to form a thick batter. Stand for an hour.
Half-fill a heavy based pot with oil until it reaches 180 C. Fry teasppons of the batter for 2-3 mins until golden (mine, and theirs, is more like well browned I think). Drain and toss in some cinnamon sugar made with 1 c sugar, 1 1/2 tsp cinnamon, 1/4 tsp nutmeg.
Cinnamon-Scented Liquid Chocolate
300 mls milk
1/2 tsp cinnamon
300 gm dark chocolate (I used 62%)
3 Tbsp condensed milk
Put the milk and cinnamon into a pot over a low heat and heat until it is just about to boil. Add the chocolate pieces and stir until it melts then add the condensed milk. Serve in little bowls alongside the churros.
Friday, February 4, 2011
FFwD- Basque Potato Tortilla
Finally I am posting this FFwD on the right day! AND I am back on track with the recipes. This weeks pick was this tortilla. I have made this kind of thing many times in the past. A tortilla like this something you can serve as a light meal (we had our for dinner with a salad), or cut up and served as a tapa with drinks. The Italians make something similar but theirs is called a Fritatta. I have made both and to me both are as good as each other...although Italian fritatta's don't seem to have as much potato in them as this one does and often include a bit of parmesan. The 'recipe' I have always used, and I put it in inverted commas because you can really do what you like with this dish, is a Ray McVinnie one where he slices the potatoes rather than cubes them. Both are good and I really don't think it matters too much as to what you do. I did find that the potatoes took longer to cook through than when they are sliced, but Harry was happy as to him it looked like eggs and chips tortilla style due to the colour I got on the potatoes. I'm not sure that the whole garlic clove and sprig of fresh rosemary added all that much to the flavour and I think that I will continue to do my old method of sauteing the garlic with the potato to give more oomph. Regardless this is an easy dish perfect for a quick lunch or dinner and even better as a snack with drinks. See how the others went with their dish here.
| Starting to saute |
| Finally cooked through |
| Eggs added |
| Almost ready to go under the grill |
| Inside the tortilla |
Wednesday, February 2, 2011
Orange Tea Cake
On one of the blogs I follow, I found a nice easy recipe for this Orange Tea Cake. As the boys have now ...ahem... BOTH started school I thought I would come home and make something I could put in their lunchboxes for the next couple of days. I immediately thought of this as it was easy, looked pretty tasty and seemed like the perfect thing for a lunchbox and for me when I'm having a quiet cup of tea in my now quiet household after the busy school holidays. I was not wrong. I took The Food Librarian's advice and just sprinkled icing sugar on top, but an orange glaze would also be good, as would a chocolate buttercream icing (as trialled by Reuben) with the buttercream I made earlier for the eclairs (see the previous post)). This cake is light and full of orange flavour. I think rubbing the zest through the sugar really makes the difference here. I have done this before with lemon cake and have noticed the bigger flavour hit you get doing this. Anyway give this a go especially if you want something easy to bake and easy to eat.
Orange Tea Cake (from The Food Librarian)
115gm butter, softened
3/4 c sugar
4 tsp finely grated fresh orange zest
2 large eggs
1/2 c sour cream
1/4 c fresh orange juice
1 1/2 c flour
1 tsp baking powder
1/2 tsp baking soda
Icing sugar for dusting
Preheat oven to 350°F and grease and line a 20 cm square tin.
Whisk together dry ingredients and set aside.
Rub the zest with the granulated sugar until damp which will make the sugar very fragrant.
Cream the butter and sugar (with zest) until creamy.
Add eggs one at a time then add the sour cream and orange juice and mix.
Add flour mixture until just incorporated being careful to not overmix.
Bake about 30-40 minutes. Cool in pan for 10 minutes, then turn out onto a rack.
When completely cooled, dust with powdered sugar.
Pour yourself and your friend a cup of tea or coffee, and enjoy!
Chocolate Eclairs and Dorie's Cream Puff Recipe
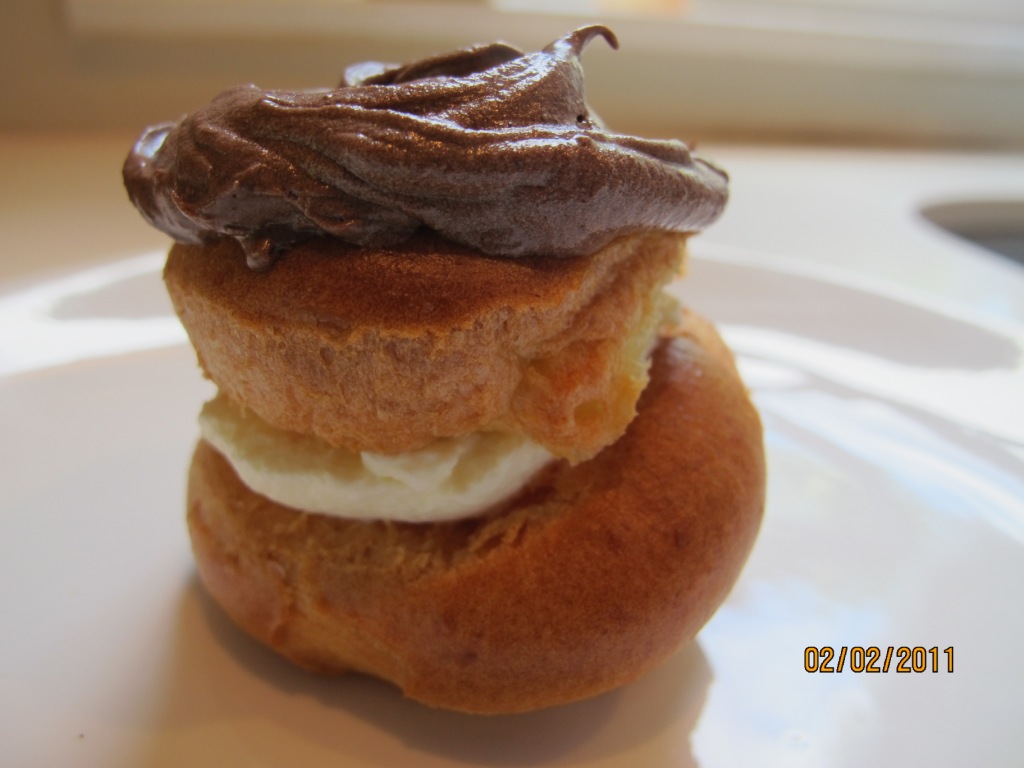
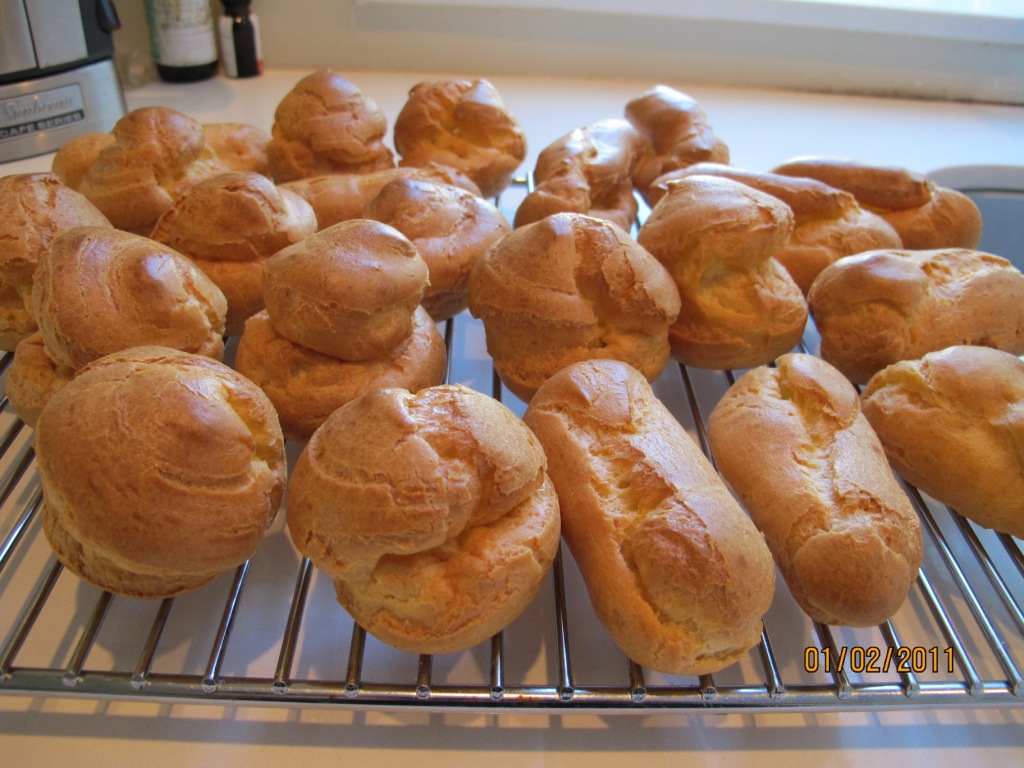
My dad's favourite desserts are Brandy Snaps and Chocolate Eclairs. I will often buy the brandy snaps (although I have made my own in the past), but I am always on the lookout for a good choux pastry recipe. Last night was the night before Reuben was due to start school so I wanted to make a nice dessert for them as a treat. Actually it was also the night before Harry was due to start school too but I got confused and thought it was the next day...until the school called me mid-Powhiri at Reuben's school, to ask why Harry was sick. You can only imagine the panic and the bad-mother-moment feeling that arose form that! We ended up, rather sheepishly, getting him to school by 11am so all was not lost. Anyway I digress.... The boys also love choclate eclairs so I thought this was a perfect excuse to try a different choux pastry recipe and to make them a treat I know they love. Bring on Dorie and her 'Around My French Table' book. I have learned to trust in Dorie. Her recipes are pretty much always reliable so I thought they would turn out well. And they did.
I made both round and long pastries. Last night I served them with whipped cream (for Reubs) or ice cream (for Harry) and a real chocolate sauce. I have to say that even though I only used 62% dark chocolate, it was still a bit bitter and didn't really complement the pastry all that well as the flavour was quite dominant so next time I'll use just the plain old dark. Today I decided to whip up some more cream and make a basic chocolate buttercream for a more traditional Kiwi chocolate eclair and they were delicious. In fact far too good for me so I'll have to freeze them for a later day treat.
The recipe itself differed from the one I usually make which has all water. This one had both milk and water. They were very easy to make, rose well and tasted great. For anyone who is scared of making choux pastry, give it a go as it is actually deceptively easy so long as you follow the instructions.
FFwD- Chicken B'stilla
Yes I know it isn't Friday and for those other members of the French Fridays with Dorie group I know I am way behind BUT in my defense it has been a very busy last month and a half with the end of the school year, Harry's birthday, Xmas, my brother's wedding, then organsing and going on our 'summer' holiday as well as working for most of it. So I am playing a bit of catch up...well a lot of catch up. I was thrilled when this recipe was put onto the rotation for the group as it was one which really appealed to me the minute I saw it in the book. I decided to make it for dinner last night but actually started making it the day before. It made dinner preparation very quick and easy last night and although there are a few steps to the recipe, none are labour intensive.
A b'stilla is a Morrocan dish and is traditionally made with pigeon...hmm I don't know if I could eat those rats with wings! I didn't know if I would like the flavour of this pie as I don't tend to like sweet and savoury together but in the interest of forging new grounds I was willing to give it a go. And I'm glad I did. The flavours in this dish really improve with age so making the filling the day before helped to develop a complexity it lacked when it was first made. I even made sure that in the interest of following the recipe and being more authentic that I would do the cinnamon sugar on top even though my mind was telling me yugh! And it was good!
You start off with marinating the chicken in some onions, garlic and spices, then simmering it in some broth until you can shred the chicken up. The remaining stock is then reduced right down to abut a cup and thickened with egg and honey. This was probably the most tricky part as the eggs can quickly scramble when they are added to the hot stock. Mine did a bit but I was able to whisk it well and I didn't even notice it once it was made. However I read on another blog a good tip to temper the eggs first and in hindsight, that would have been a good idea and totally made sense, (interesting how hindsight is 20/20). Finally the chicken, some fresh herbs and onions are added back, given a good mix and put in the fridge until the next day or even for a few days if you like. The next day you line a cake tin with fillo, cover it all up to make it look good and sprinkle over the cinnamon sugar. Bake it until it's crispy and there you have a lovely pie with delicate and slightly unusual flavours.
| Chicken marinating |
| With the stock added |
| Fillo lined tin |
| With added chicken mix |
| Lined top and bottom with toasted, slivered almonds |
| Waiting to be baked |
| Finished product |
| Yum! |
Subscribe to:
Posts (Atom)