Wednesday, January 19, 2011

Rocky Richmond Road Slice


Tomorrow we are off on holiday for a week up to a little Kiwiana bach in Scandrett Bay. We are really looking forward to it and are hoping like crazy that the weather behaves for us...especially as we will have 2 extra children with us which may not be all that much fun if we all end up being stuck in a little bach while it pours outside. I guess it's out of our control but we can only hope.


Anyway for those who know me, will know that I always a) overpack and b) never run out of food. I have tried to be organised but knowing me I will have overdone it. Today I have been baking like crazy for our trip. I also made a full recipe of the Annabel Langbein Spicy Rub to take as well. I have made a gluten free carrot cake for Dons, a Stem Ginger Cake, some Triple Chocolate Chip Biscuits and this slice which is from my new Ripe cookbook. For those of you who don't know what Ripe is, it is a Delicatessen/Cafe in Grey Lynn that has wonderful home baked slices, brioche and cakes as well as lovely salads, pies, rolls etc and food you can get instead of having to cook dinner or get greasy takeaways. The menu for this changes daily depending on what they feel like making and I would think, what season it is. It is really worth a visit if you are ever in the neighbourhood. Oh and yes the coffee is fantastic.


Anyway this slice seemed perfect to take especially as we will have 4 hungry children to feed and it was also easy. It really does taste like the one you can buy there as we have bought it many times before. 


Rocky Richmond Road Slice (Ripe)


200 gm butter
1 c caster sugar
3 Tbsp cocoa, sifted
3 large eggs
250 gm malt biscuits
250 gm superwine biscuits
250 gm marshmallows chopped (or else use mini marshmallows)


Grease and line a 20 x 30 cm tin.


Using a rolling pin crush the biscuits to get a rough crumb.


In a pot put the butter, sugar and cocoa and stir over a low heat until smooth. Add the lightly beaten eggs and cook about 5 mins stirring constantly. Remove from the heat and cool 10 mins.


Pour mixture over the biscuit crumbs and marshmallows. Push down lightly into the tin and put in the fridge. Ice with a chocolate buttercream icing.


Well everyone have a good week ahead. I'll post some photos when we get back from holiday. Hopefully I will be able to fit everything we need in our 2 cars BUT watch this space xxx

Tuesday, January 18, 2011

Lemon Polenta Cake


Another of my favourite cooks is Nigella Lawson. What I like the most about her is that she seems so lacking in pretentiousness when it comes to food. She clearly enjoys cooking and eating (as do I), and she isn't afraid to use some ingredients that to a food snob would be a big no-no. As well as that I really like her tv programmes and the one for her new book does not disappoint. I bought her latest book 'Kitchen' ages ago and when I looked at this recipe I thought it looked pretty good and would be something I would try especially as Dons is gluten free. However I put the book away, as you do, and promptly forgot about it especially as I had a glut of new cookbooks to check out. After watching the series on tv I felt motivated (and I was reminded that I had wanted), to try this and other different recipes so I got the book out and assembled all the ingredients and re-looked at the book. I only made a half quantity so made it in an 18 cm tin as I wanted to see if it was as good as it looked. It is a very easy cake to make requiring very little effort for a great flavour. Nigella describes it as like eating lemon curd in a cake form and she is absolutely right. The cake sinks in the middle which is initially a little disconcerting. However her photos show it doing the same thing so this is something that obviously happens with this cake. I think the syrup adds some weight and because the cake get quite moist and syrupy it must condense the cake a bit- especially in the middle. Besides the taste is well worth the look of it and it is amazing how well softly whipped cream can hide a multitude of sins...not to mention add that little extra vah-vah-voom to the cake. Lemon curd would also be nice with this to have on the side if you really like that lemon flavour.


Lemon Plolenta Cake (Nigella Lawson)


Cake
200gm soft butter
200 gm caster sugar
200 gm ground almonds
100 gm fine polenta/cornmeal
1 1/2 tsp baking powder
3 eggs
zest 2 lemons


Oven to 180 C. Line greased tin with baking paper.


Beat butter and sugar until pale and whipped. Mix together the almonds, polenta and baking powder and beat some into the butter mixture. Add one egg, then alternate eggs and dry ingredients beating all the while.


Beat in zest and spoon into the tin. Bakes about 40 mins. The cake will shrink away from the sides and may seem a bit wibbly but test it anyway and if a cake tester comes out clean it's ready. Remove from the oven but leave in the tin.


Syrup
Juice of 2 lemons
125 gm icing sugar


Bring the juice and icing sugar to the boil. Once the sugar is dissolved it's done. Prick the top of the cake with a cake tester (or a piece if dried spaghetti as she does on telly) and pour over the warm syrup. Leave to cool.


Monday, January 17, 2011

Warm Apricot Pie


Last night we had Mum and Bobby over for dinner. They will be looking after our house when we go away on holiday on Thursday. Since we were broken into I am worried every time we leave the house empty that they might come back again. Although we were lucky they didn't ransack the house, the feeling of insecurity can take a long time to subside. As well as that poor Harry has been having terrible nightmares ever since he got back from his dad's house about monsters and them trying to break into the window. At least mum and Bobby will be here pretty much all the time so I'm sure the house will be ok. 


For dinner I made a boneless leg of lamb which I cooked on the BBQ. I marinated it in Annabel Langbein's Spicy Mix and it was really, really delicious. The marinade is so good that I will make some to take away with us to marinate lamb chops in as the full recipe makes quite a bit and can be stored in the fridge for a week. It is well worth making for those of you who have her book. For anyone else who might want it let me know and I can post the recipe here. I served it with a roasted vegetable salad of potato, kumara, red onion, whole garlic cloves and rosemary. Also made was a delicious corn salad from Julie Biuso (another of my favourite cooks), which has fresh corn, tomato, avocado, basil and a lovely lemony/mustard dressing.


Dessert was a toss up between this Warm Apricot Pie and a Plum and Vanilla Cake both from Bill Granger's book 'bills food'. I may make the plum cake for work tonight if I get a chance as it looks really yummy too. I was glad to make something form this book as I have had it for ages and have only made a few things from it. I love Bill Granger's whole food philosophy. He uses simple, fresh ingredients and doesn't overdo the fat and decadence (although he can pull it out of the hat on occasion), instead focusing on clean, tasty, well matched flavours. This pie was no exception. It was all about the apricots which were showcased in a crisp and lovely pastry that was very easy to make. I just served mine with softly whipped cream but ice cream would be great as well, as would a nice creme anglaise. The only thing I found was that my apricots were not quite ripe enough which made it a bit sour in parts. I really should have made a creme chantilly (basically cream whipped with icing sugar and vanilla) to counteract that, but I hadn't realised that the some of the apricots were still a bit tart. Regardless this would be great with any other stone fruit as well.


Warm Apricot Pie


Filling
1 kg apricots cut in half and the stone removed
1/2 c caster sugar
1 tsp vanilla
25 gm butter cut into small pieces
caster sugar to sprinkle


Pastry
2 c flour
2 Tbsp caster sugar
180 gm cold butter
5 Tbsp iced water


Toss the apricots with the sugar and vanilla.


Pastry- Process the flour and sugar with the butter in a food processor until it resembles coarse breadcrumbs. Add the iced water and process until the mixture forms a ball. Wrap in cling film and put in the fridge for at least 30 mins.


Oven to 200 C. Roll pastry out to about 32 cm and place in a greased or nonstick pie dish allowing the pastry to drape over the sides. Put the apricot mixture in and dot over the butter and fold over the pastry sides. Brush with water and sprinkle with the caster sugar. Bake for 45 mins or until the filling is bubbling and pie is golden. 

Saturday, January 15, 2011

Roasted Banana Cheesecake and Toffee Sauce for Athol


Last night we were invited out for dinner to my friend Marley and her husband Tim's newly renovated (and very beautiful), house way up in the wop-wops, (well actually it was about a 40 min drive from our place so I think that qualifies as the wop-wops). The occasion was Athol's birthday and with respect for him I won't divulge his age other than to say he looks pretty fabulous for his age. I, of course, took dessert as I always gravitate to the sweet stuff and I always have a ton of recipes I want to try. After much perusing of my cookbooks I was trying to choose between Dorie's Brown Sugar-Apple Cheesecake and this one from my new Ripe cookbook called Roasted Banana Cheesecake. I thought I would go for this one as I often get a new cookbook then don't end up using it all that much as I load up on other new cookbooks....I'm sure those of you amongst us who baking/cooking obsessed can ideantify with this! This was also very easy to make and it also meant I could prepare it all the day before leaving me the whole day free without having to cook in a hot kitchen. I think cheesecakes are one of those desserts that anyone can make as they are pretty straightforward and don't require a lot of skill which makes them a perfect choice for the new baker so if this appeals give it a go.


This one was well worth making. Although the recipe didn't call for it, I thought a toffee sauce would be perfect to pour over the top. Had I been serving this at home I would have topped each piece of cheesecake with some caramelised banana and drizzled the sauce over each piece. But as I was taking it somewhere I poured it over the top of the cheesecake which I thought also looked really good. I took the caramelised bananas in a separate container and served it alongside with some softly whipped cream...whipped in Marley's new food processor....which she has yet to fully discover. 


The cheesecake was a rich and decadent as cheesecakes are meant to be. It is definitely a treat dessert which you will understand when you see the list of ingredients. There was a real depth of flavour probably due to the fact that the bananas had been roasted first. The toffee sauce recipe I got from Annabel Langbein's new cookbook. It was tooth-achingly sweet but really worked well with the cheesecake. This sauce could be kept for awhile in the fridge and would be great poured over ice cream or on a sticky toffee pudding if you don't eat it by the spoonful first. The caramelised bananas were a good accompaniment and were easy to make. I think I would make these again to have with pancakes or pikelets for a nice breakfast- good yoghurt as well would put these in the sublime breakfast category.


Roasted Banana Cheesecake (from 'Ripe')


Base
250 gm malt biscuits
100 gm butter


Put into a food processor and process until all crumbly and mixed well. Put into a lined 26 cm springform tin (I just lined the base), and put into the fridge to chill.


Filling
4 bananas left intact
1 kg (yes 1 kg!) cream cheese
6 eggs
1 c caster sugar


Oven to 170 C. Roast bananas on a lined tray for 15 mins until soft and blackened. Remove form the skins and leave to cool. I found quite a bit of watery juice came out so I drained some of that off. 


Put the other ingredients into a food processor and mix well to make nice and smooth. Add the cooled bananas and mix again. Pour over the base and bake about 45 mins until the top just jiggles a bit when you move the tin. Leave in the tin overnight in the fridge.


Caramelised Bananas


3 bananas
3 Tbsp sugar
3 Tbsp butter


Melt the butter and sugar in a frying pan and add the bananas which have been cut in half lengthwise. Cook over a medium high heat until caramelised turning over so both sides get a nice colour. Remove from the pan and leave to cool.


Toffee Sauce ('The Free Range Cook')


I made half the recipe which gave me about 1 1/2 c of sauce.


Put 1/4 c water into a pot. Add 1 c caster sugar and place over a medium heat until the sugar dissolves and comes to the boil. DO NOT STIR as the sugar will crystallises, instead swirl the pan to mix.Boil about 8-10 mins until it goes a nice golden caramel colour. Remove from the heat and pour in 1 c cream and 1 tsp vanilla. Stir over a low heat until the sauce smooth. Store in the fridge.


Just starting to boil

Starting to colour

Just about ready for the cream

With the cream added

Final product and lovely smooth, sweet, rich toffee sauce


Finally here are a few pics from last night....


Marley, Dons, Athol


Athol, Ingrid, Margaret


Charmaine, Tim, Mike and Marley (husband swapping!)

Me, Athol, Charmaine, Marley, Ingrid

 Thanks for a great night Marley and Tim and Happy Birthday Athol!


Wednesday, January 12, 2011

Baking for Nightshift- Afghan Cupcakes


When I got up yesterday after once again trying to sleep in this heat, I thought I might make something to take to work as for the first night I worked I had been busy at the shop replacing the things we had stolen when our door got kicked in so ran out of time to bake. My camera had also been replaced so I was also really keen to try it out and get back to taking good photographs instead of the ones I was getting from the borrowed cameras I have had to use. As well as this a lovely woman I work with called Ning, who has been away for ages, was meant to be working so I wanted to make something to welcome her back to work. Unfortunately she ended up cancelling her shift so she wasn't even there. Well all that meant was that there were more cupcakes for us and these ones were worth coming to work for. 

The two cupcake books I use the most are 'Crabapple Bakery' and this one which is called 'Divine Cupcakes'. Not only are the ideas really good but the recipes always taste wonderful and are no-fail, so to my mind that makes them both perfect cookbooks. I have often eyed this recipe up as I LOVE afghan biscuits. For any non-Kiwi's who may be reading this blog these are chocolate biscuits made with cornflakes with chocolate icing and topped off with a walnut. I had always thought this recipe might be a bit more time consuming but I was wrong. It did have a couple of steps to it but it was easy and well worth it. The cake itself was light and had a wonderful chocolaty flavour, the walnuts enhancing it. But the real star were the pralined cornflakes on top. They totally complete the cake and bring all the flavours of the afghan into it. The crunch also complements the lightness of the cake and the smoothness of the buttercream icing. The main thing I did differently when I made these is change the method to how I think cupcakes turn out the best so I will do that when I give you the recipe. I also made 2/3 of the recipe and got 19 cupcakes from the mixture but I will give the full ingredient list here.

Afghan Cupcakes 

185 gm butter
2 tsp vanilla
380 gm caster sugar
3 eggs
300 gm self raising flour
100 gm cocoa
250 ml water
150 gm chopped walnuts

Oven to 175 C and line cupcake tins.

Cream the butter and add the sugar in two halves creaming well after each addition. Add the eggs one at a time beating well after each. Add vanilla.

Sift flour and cocoa and add to the butter mixture with the water. Mix until smooth. Stir in the walnuts..

Bake about 20 mins then remove the cupcakes to a wire rack to cool completely.

Pralined Cornflakes

350 gm caster sugar
4 c cornflakes

Slowly melt the sugar in a pot making sure you watch it well so it doesn't darken and burn before all the sugar is melted. Swirl the pot to mix the sugar (don't stir). Once it is melted and reaches a golden amber colour add the cornflakes, mix quickly and tip onto a baking paper lined try. Pull apart gently to make small clumps (or you can also break it up once it has cooled).

Decorate cupcakes with chocolate buttercream icing and the pralined cornflakes.

Monday, January 10, 2011

A Day Trip to Cornwallis

Yesterday we decided to get the kids out of the house and go to the beach for the day. Not far from where we live, (about 20 mins drive), is a lovely beach called Cornwallis. It has all that you could need- loads of trees, grass, sand, calm sea, toilets and best of all space. We try to go there during the summer at least a few times even though packing for a whole day is quite the mission....hmmm I wonder how it will be when we have to pack to go away to the bach for a week! By the time we get togs, towels, food (lots of it), a BBQ, toys, seats etc the car is quite full.


Luckily for us it wasn't all that busy when we got there making parking a breeze and giving us the choice of spots or trees. As it is so big even when there are loads of people it never feels crowded unlike those horrendous pictures you see of some overseas beaches where you might as well be sitting on each other such is the lack of space. Although the tide was out when we got there and it was a bit windy it ended up being a stunning day and we had a fantastic relaxing day.


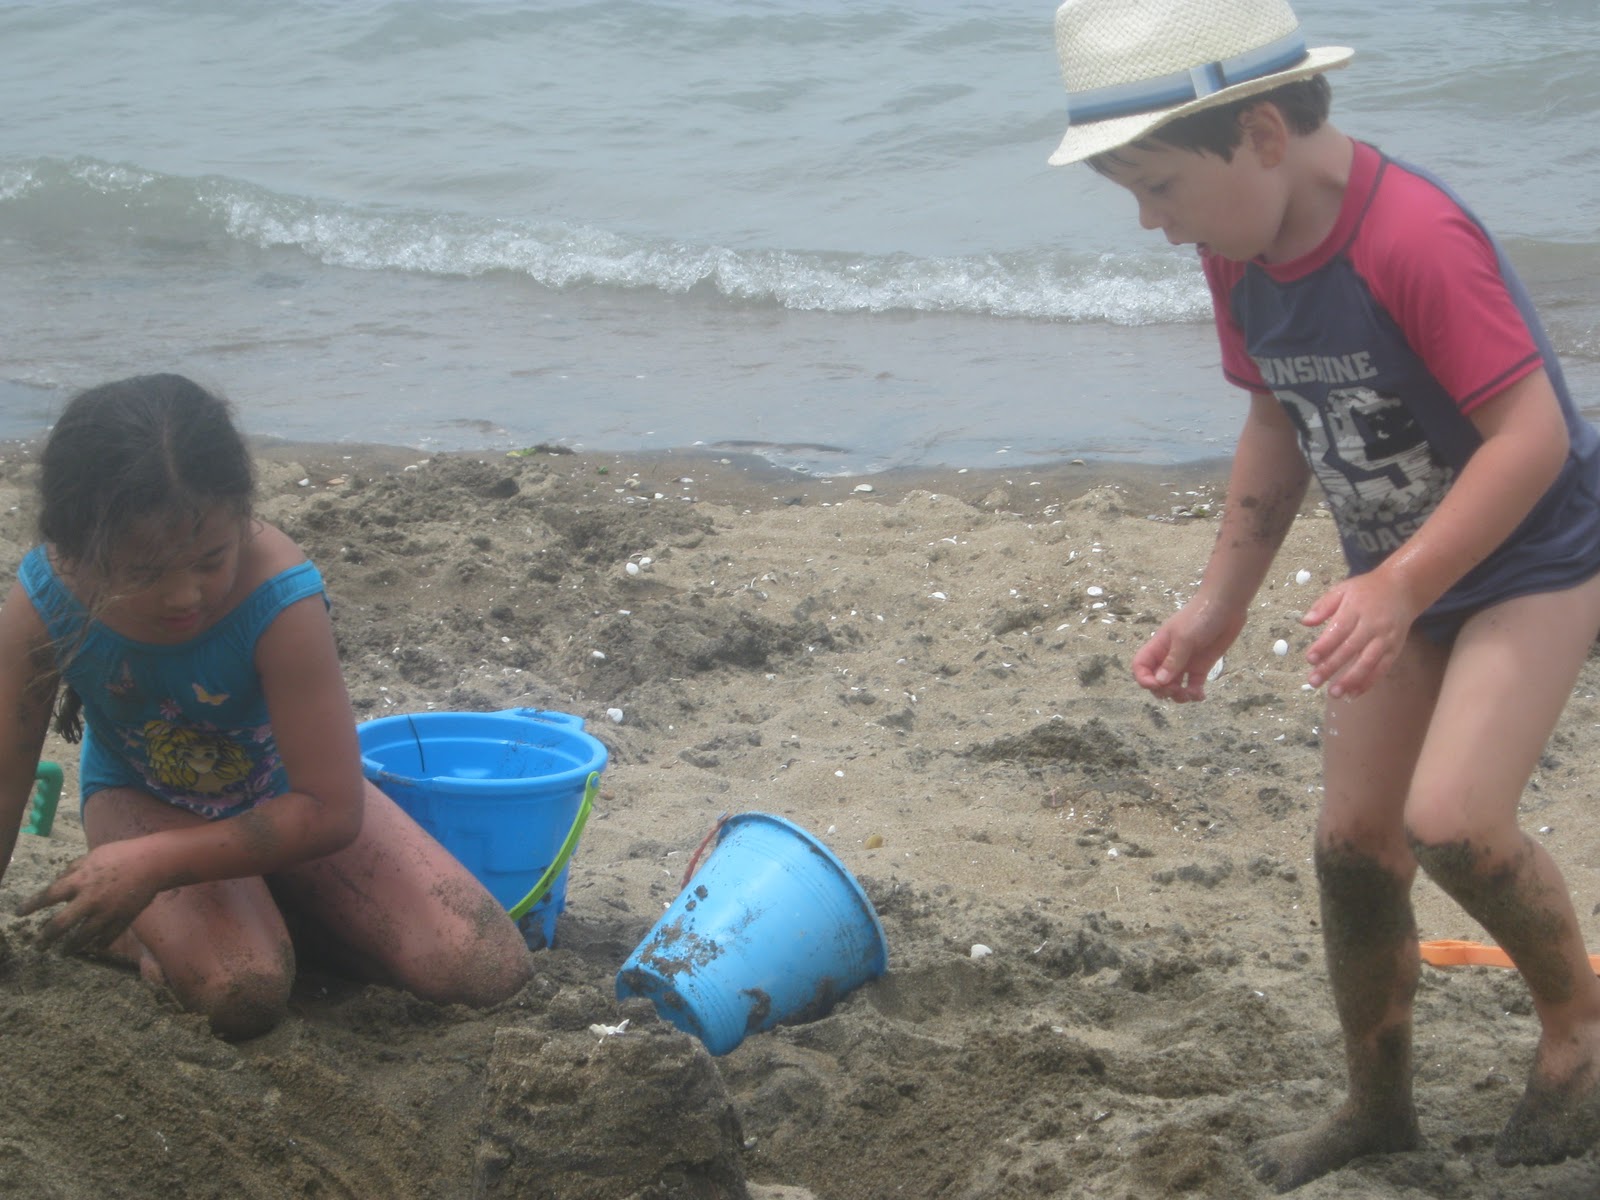
I made mini bacon and onion quiches, chocolate cupcakes and we had sausages for the BBQ, tomatoes from the garden, avocado and some bread as well as some other nibbly bits. Harry and his cousin Hollie played for hours making sandcastles and swimming with us. It's amazing at how much more self sufficient kids are when they have each other to play with leaving us ample time to read the paper and just relax...not something I ever get much time to do.


Anyway here are some photos from the day taken on a not-very-good camera as I am still waiting for my good camera to be replaced after the burglary. I never realised just how much I used my camera until I no longer had it so I really miss being able to grab it to get some good photos.


Dons relaxing

Playing with cousin Holls

Looking up to our picnic site (tide out a bit)

View looking down the beach


Finally a nice photo of Reubs...it's hard to get him to pose for a photo these days

Friday, January 7, 2011

Baking for Nightshift- Standby Chocolate Brownies

As you can see there are no photos of these brownies which does make my new posts a little dull I think. In fact I was even thinking about flagging the blogging until I get my replacement camera once the insurance company has processed my claim. However it seems a pity to not post about something new I have made so here it goes. We now only have one remaining camera in the house since the burglary which isn't a very good one and now my son (it's his one) has taken it to his dads house so I have no other options to photograph my food/baking.... actually I did try to use my iphone but the photo quality was rubbish.

Anyway I'm in the middle of nightshift yet again and it is pretty much impossible to sleep due to the heat. Even though I have a fan in my room it doesn't stop you from having to breathe in hot recycled air. Therefore not only do I wake up early and unable to go back to sleep, but I wake up feeling dopey and heavy-headed from the stuffy heat. After I got up I thought I might as well whip something up for work tonight. For Xmas I got the new Donna Hay cookbook called 'Fresh, Fast, Simple'. In that is a recipe for Standby Brownies which are made with cocoa. They were very easy to make and taste really good. They lack the real fudginess of a brownie made with real chocolate but are like a dense moist chocolate cake. I did add chocolate drops to the mix as I really like the little hits of chocolate you get when you eat them. Very easy to make and they will be a great standby when I need to whip something up in a hurry. I think the girls will be happy enough with these tonight.

Standby Brownies (Donna Hay)

150 gm butter
3/4 c (75 gm) cocoa
1 1/4 c (275 gm) caster sugar
3 eggs
1 tsp vanilla
1/2 c (75 gm) flour

Melt the butter with the cocoa and sugar until butter melted. Put into a bowl and whisk in the vanilla and eggs. Sift over the flour and whisk in.

I stirred in some milk and dark chocolate drops too.

Put into a lined 20 cm square dish and bake at 160 C for about 30 mins.